Why You’ll Love This Recipe
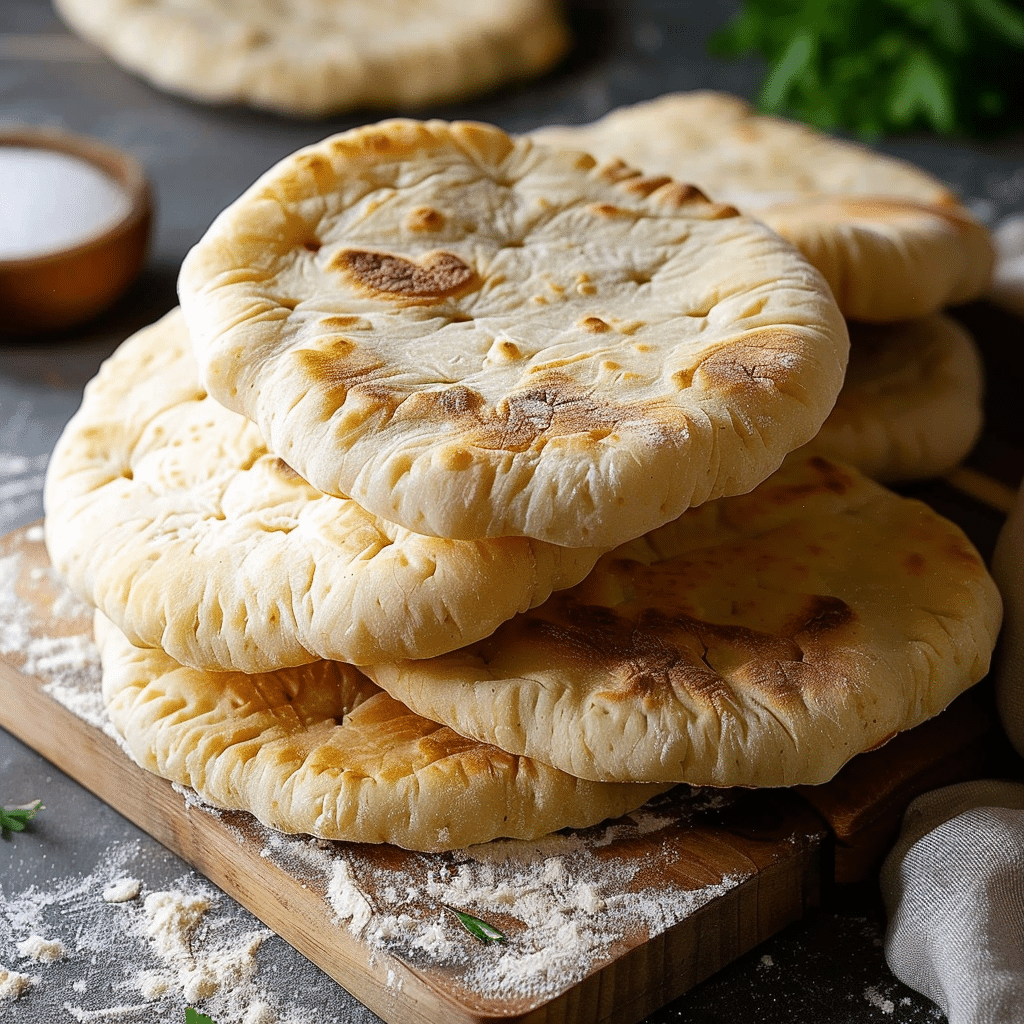
- Soft and Fluffy Texture: Achieve the classic pita bread texture without gluten.
- Simple Ingredients: Made with accessible gluten-free flours and pantry staples.
- Quick Preparation: Ready in under two hours, including rising time.
- Versatile: Ideal for sandwiches, wraps, or as a side with dips.
Ingredients
- 1½ cups (180g) gluten-free all-purpose flour blend
- 1 cup (120g) gluten-free whole grain flour (e.g., brown rice flour)
- 1 teaspoon xanthan gum (omit if your flour blend includes it)
- 1 teaspoon salt
- 1 teaspoon instant yeast
- 1 teaspoon sugar
- 1¼ cups (300ml) warm water
- 2 tablespoons olive oil
- 1 teaspoon apple cider vinegar
Tip: You’ll find the full list of ingredients and measurements in the recipe card below.
Directions
- Prepare the Dough: In a large bowl, mix together the gluten-free all-purpose flour, whole grain flour, xanthan gum (if needed), salt, instant yeast, and sugar. Add the warm water, olive oil, and apple cider vinegar. Stir until a smooth, slightly sticky dough forms.
- First Rise: Cover the bowl with a damp cloth or plastic wrap and let the dough rise in a warm place for about 1 hour, or until it has doubled in size.
- Shape the Pitas: Preheat your oven to 475°F (245°C) and place a baking stone or heavy baking sheet inside to heat. Once the dough has risen, divide it into 8 equal portions. Roll each portion into a ball and then flatten it into a disc about ¼ inch thick.
- Second Rise: Place the discs on a piece of parchment paper, cover them with a damp cloth, and let them rise for an additional 30 minutes.
- Bake: Carefully transfer the parchment paper with the pitas onto the preheated baking stone or baking sheet. Bake for 5–7 minutes, or until the pitas puff up and are lightly golden.
- Cool: Remove the pitas from the oven and let them cool on a wire rack.
Servings and Timing
- Servings: This recipe yields 8 pitas.
- Preparation Time: 15 minutes
- First Rise: 1 hour
- Shaping and Second Rise: 45 minutes
- Baking Time: 5–7 minutes
- Total Time: Approximately 2 hours
Variations
- Flour Substitutes: Experiment with different gluten-free flours like sorghum or millet for varied flavors.
- Herbed Pitas: Add dried herbs such as oregano or thyme to the dough for a savory twist.
- Sweet Pitas: Incorporate a tablespoon of honey or maple syrup for a hint of sweetness.
Storage/Reheating
- Storage: Store cooled pitas in an airtight container at room temperature for up to 3 days.
- Freezing: Freeze cooled pitas in a freezer-safe bag for up to 2 months. Thaw at room temperature before reheating.
- Reheating: Warm pitas in a dry skillet over medium heat for 30 seconds on each side, or wrap them in foil and heat in a 350°F (175°C) oven for 10 minutes.
FAQs
Can I use a different gluten-free flour blend?
Yes, you can substitute with another gluten-free all-purpose flour blend. Ensure it contains xanthan gum or add it separately if needed.
How can I make the dough less sticky?
If the dough is too sticky, add a small amount of additional flour, a tablespoon at a time, until it reaches a manageable consistency.
Can I make these pitas without xanthan gum?
If your flour blend doesn’t include xanthan gum, you can add 1 teaspoon to help with structure and elasticity.
How do I prevent the pitas from deflating after baking?
Allow the pitas to cool completely on a wire rack before storing. This helps maintain their puffed shape.
Can I use active dry yeast instead of instant yeast?
Yes, you can use active dry yeast. Activate it in warm water with sugar for 5 minutes before adding it to the dry ingredients.
How can I make the pitas softer?
For softer pitas, brush them with melted butter or olive oil immediately after baking.
Can I make these pitas ahead of time?
Yes, you can prepare the dough and let it rise in the refrigerator overnight. Allow it to come to room temperature before shaping and baking.
Can I bake these pitas on a baking sheet instead of a baking stone?
Yes, a preheated baking sheet works well. Place the pitas on the parchment paper and transfer them to the hot baking sheet.
How do I know when the pitas are done baking?
The pitas should puff up and be lightly golden. If they haven’t puffed, they may need a few more minutes in the oven.
Can I add fillings to the dough before baking?
It’s best to bake the pitas plain and add fillings afterward to prevent them from affecting the puffing process.
Conclusion
This easy gluten-free pita bread recipe offers a delightful, soft, and fluffy bread that’s perfect for sandwiches, wraps, or enjoying with your favorite dips.
Print
Easy Gluten-Free Pita Bread
- Total Time: 2 hours
- Yield: 8 servings
- Diet: Gluten Free
Description
This Easy Gluten-Free Pita Bread is soft, fluffy, and perfect for stuffing with your favorite fillings. Made with simple ingredients and no yeast required, this gluten-free recipe yields beautifully puffed pockets that are ideal for sandwiches, wraps, or as a side with dips. Ready in under two hours, it’s a versatile and delicious alternative to traditional pita bread.
Ingredients
- 1½ cups (180g) gluten-free all-purpose flour blend
- 1 cup (120g) gluten-free whole grain flour (e.g., brown rice flour)
- 1 teaspoon xanthan gum (omit if your flour blend includes it)
- 1 teaspoon salt
- 1 teaspoon instant yeast
- 1 teaspoon sugar
- 1¼ cups (300ml) warm water
- 2 tablespoons olive oil
- 1 teaspoon apple cider vinegar
Instructions
- Prepare the dough: In a large bowl, mix the gluten-free all-purpose flour, whole grain flour, xanthan gum (if needed), salt, instant yeast, and sugar. Add warm water, olive oil, and apple cider vinegar. Stir until a smooth, slightly sticky dough forms.
- First rise: Cover the bowl with a damp cloth or plastic wrap and let the dough rise in a warm place for about 1 hour, or until it doubles in size.
- Shape the pitas: Preheat your oven to 475°F (245°C) and place a baking stone or heavy baking sheet inside to heat. Once the dough has risen, divide it into 8 equal portions. Roll each portion into a ball, then flatten it into a ¼-inch thick disc.
- Second rise: Place the discs on parchment paper, cover them with a damp cloth, and let them rise for another 30 minutes.
- Bake: Carefully transfer the pitas on the parchment paper onto the preheated baking stone or baking sheet. Bake for 5–7 minutes, or until the pitas puff up and are lightly golden.
- Cool: Remove from the oven and cool on a wire rack.
Notes
- Flour substitutes: Sorghum or millet flour can be used for a different flavor profile.
- Herbed pitas: Add dried herbs such as oregano or thyme to the dough for a savory twist.
- Sweet pitas: Incorporate a tablespoon of honey or maple syrup for a hint of sweetness.
- Prep Time: 15 minutes
- Cook Time: 5 minutes
- Category: bread
- Method: Baking
- Cuisine: Middle Eastern


